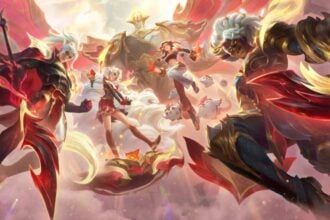

You can defeat all the bosses inside the new Cuphead DLC.
The new Cuphead DLC brings more than enough content for you to explore. Players have new weapons to use, more secret endings to explore, and secret bosses to beat. Getting hours of more content, the new DLC is surely worth getting. Moreover, inside Cuphead, bosses can be tough to defeat, and sometimes you might find them overwhelming. So below, we have made a complete guide on defeating all the bosses in the new Cuphead DLC.
Read More: Fire Emblem Warriors: Three Hopes – How To Get All Achievements And Rewards
How to defeat All Bosses in Cuphead DLC
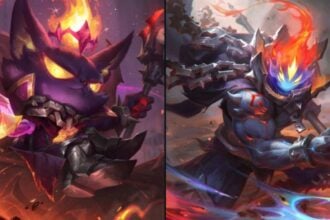
You will defeat around seven new bosses to finish the Cuphead DLC. However, there are more bosses you will face when you go through challenges, and there is also a secret Boss you will be able to defeat. Each boss will require a different tactic and approach.
There are two-three stages or more inside each boss. So before going one-on-one against them getting to know the tactics is important. Moreover, check out the complete list of all bosses inside Cuphead and how to defeat them.
Moonshine Mob

To defeat the Moonshine Mob, you will have to go through 4 stages of the fight. The boss is a small reference to the mob back in the 1920s, which used to sell moonshine. There are a total of 4 bosses, and each phase will have a different one trying to kill you. These bosses are a Spider, a Female Ladybug, an Anteater, and lastly, a Snail. You can use Crackshot or Chaser to beat this boss and equip Ms. Chalice with your astral cookie.
Phase 1
You will have to go one-on-one against the Spider for the First Phase. You must stay in the middle, damage the spider just as it appears since it doesn’t attack you, and avoid the mob from the sides. The fight is fairly easy to complete if you avoid and damage continuously.
Phase 2
In the next phase, you will take on the ladybug who will try to kill you using her deadly dance. Here you will have to avoid the red and yellow beams. Remember to stay between the beams to avoid getting hit and damaging the ladybug when you get the chance. Moreover, note down to shoot the police bugs and barrels that come your way.
Phase 3
In Phase three, you will see the Anteater with a snail inside its hat. You will see the Snail when the Anteater takes out the hat, so deal damage during this time. During this phase, target the Aneater’s mouth as it comes out a few times during the battle and damages it as much as possible. Just stand clear of the lick attack and use your parry if you do get caught. Also, look out for the Knockout banner, and lastly, damage him when you can.
Phase 4
Lastly, players will need to avoid the attacks for the last phase. Remember to attack from a distance, and that’s it. If you did damage in Phase 3 to the Snail, this phase should be quick and easy to finish.
Glumstone The Giant

The Glumstone Giant has around 3 Phases you will have to go through to defeat him. To defeat him, we recommend you go with Cuphead and the Heart Ring charm to help you give an edge. Facing this boss, you will get to do a lot of parries, so equipping this charm can be very useful inside the game. Moreover, check out how to defeat it below:
Phase 1
In this phase, players must avoid the pillars and the spikes that come along with them. When the Glumstone will open its mouth, remember to parry the potion plumes it sends at you. Moreover, when he picks up the bear, move to the right side of the screen to avoid it. Players will also have to kill gnomes that come out of the ground. Do all of this and damage the Glumstone in between to get to the second phase of the boss battle finally.
Phase 2
During Phase 2 of this fight, you will be inside a puppet show where Twist Up wonders. Here you will have to avoid the puppet balls coming at you by just going left or right and shooting the gnomes who come to attack you on the ground. During this damage, the boss and Phase 3 won’t be that far away for you to reach.
Phase 3
The final phase is where the Glumstone will stop trying to kill and swallow you. Here, all you need to do is avoid falling into the acid inside the stomach. Furthermore, Kill all the chicken drumsticks and gnomes that come at you, and aim at the stomach to damage him. Again, this phase is pretty easy, so make sure you do what we mentioned.
Esther Winchester

You will probably be the busiest of all bosses inside the Cuphead DLC, as there is a lot to do, from dodging, attacking, jumping, and parrying. In fact, remember to bring your Heart Ring charm into this battle, as this could help you with the battle. Moreover, you can check out each phase and how to complete the below:
Phase 1
Here the fight will start with Winchester’s attack from inside the saloon, and this will be the phase where you will have to be on your toes to get through it. Make sure you avoid her oil shots, dodge her lasso, and stand clear of the bombs dropping. Lastly, kill the flying horse who will throw a spike ball. Keep damaging her when you can, and you will reach Phase 2 in no time.
Phase 2
In Phase 2, Winchester will use the vacuum to suck everything around, including you. However, you will go towards her and not get sucked inside. After she sucks everything inside her vacuum, she will start going ham at you by shooting it all out. So make sure you do your best to avoid the safes falling from the sky and the loot she shoots back at you using her vacuum. Avoid them by positioning yourself between the projectiles. When vaults come down to the top of the screen and parry the money and gold. Inside this mess, you will still need to figure some time out when you hit the boss with your weapon.
Phase 3
Inside Phase 3, things will take a turn, and she will turn into sausage. She will throw steaks at you, of which you can parry the pink ones, so make sure to do that whenever she throws them. Also, when you shoot at her when you can and make sure you avoid the cans of beans shooting beans at you.
Phase 4
In the final phase, the boss will become a can of sausages. Here, you should watch out for the links between sausages. Here taking damage is normal, so make sure you put your best inside this fight. The boss will shoot sausage links continuously, and to avoid these links, make sure you go through the gap between the links. Moreover, pepper projectiles will also come your way to shoot her, and avoid these at the same time. Keep doing damage and avoid all the throws your way, and the boss will be good as dead.
Mortimer Freeze

It is a small fight compared to the rest of all the bosses you have faced until now in the Cuphead DLC. Unlike others, this fight will take place inside the snow. Players should equip the Astral Cookie for this fight as the ability to roll through attacks of Ms. Challice comes in handy here. Moreover, you can pick the Crackshot for this level as well. Check out the complete breakdown of each phase below:
Phase 1
In Phase 1, you will have to shoot shots upwards to the Mortimer Freeze skying above you. Kill all the ice monsters coming down before they come down and damage you. Moreover, when he summons the Whale, go on the right side to avoid getting caught up in the slam. Lastly, you will also have to avoid the card projectiles thrown at you. However, you can parry the pink-colored ones. In between the chaos, use your Crackshot to damage the boss due to its spread constantly.
Phase 2
Inside Phase 2, you will go against the Snow Monster. Here, you will need to jump and dodge all attacks. First, he will send spikes at you, so avoid them by getting between two spikes. After the monster turns into a refrigerator, ensure you avoid the ice cubes that will break down and come back as small projectiles. You can roll through to avoid these cubes from one side to the other. Lastly, he will send popsicles at you, some of which you can parry and avoid. In between avoiding his attacks, remember to use your Crackshot to damage him enough to move to Phase 3.
Phase 3
The last phase of this battle is where the screen will be full of snow platforms. Players will be up against a Giant Snowflake who will shoot laser beams out of his eyes. There is a pattern to when this happens, so get used to it and avoid it at all costs. Damage him, avoid his Ice Cream cones and bucket projectiles, and you will be good to go.
The Howling Aces

This fight will give an experience, unlike anyone you have faced inside Cuphead since you will be on a plane fighting the boss. Remember to equip your Crackshot weapon and Heart Ring charm to get the best edge inside the game. You will need to strategize everything you do in this boss battle, so be careful how you face this boss. Moreover, you can check out the complete breakdown of this boss below:
Phase 1
When you are on the top of the plane, remember to be in the center when you are up against the Fighter Pilot Bulldog. Starting the fight, the bulldog will try to flex his muscles has sent bone tattoo projectiles in your way, and he will also bring out a cat who will try to damage you with balls of yarn.
In fact, the co-pilot will throw tennis balls at you, so make sure you dodge them all, or your health will come down easily. Your best chance at winning this fight will be to avoid the tattoos by positioning yourself between the tennis balls to avoid and shoot out anything dropping from the sky. Lastly, damage him when you can, and you will move to the next phase.
Phase 2
Inside the second phase, puppies with jetpacks will come to kill you with projectiles shaped as the word “B,” “O,” and “W.” Stand in one position and shoot down the projectiles to avoid getting hit. Remember to shoot down their jetpacks to get rid of them and to get to a secret ending.
Phase 3
This phase is pretty easy to deal finish. First, whenever you see the Female Pilot, shoot and damage her. Then, remember to take care of the turrets and damage them before they damage you, and lastly, avoid the dog which will fly across the screen.
Phase 3 (Secret Ending)
If you do what we told you to do in Phase 2, you will reach this secret ending. However, if you don’t, you will reach the ending mentioned above. When the pilot appears, avoid the Pineapple grenades and thorns that come out of them after they explode. Remember the fire hydrants we told you to shoot during Phase 1. They will come back here to so do the same. Remember to damage the pilot in between all the hassle, and you will be good to go.
Chef Saltbaker

The last of all bosses inside the Cuphead DLC is Chef Saltbaker, and to defeat him, you will need to be at your best without a doubt. After you reach this point in Cuphead, pick any weapon or charm you are good at using. Moreover, you can check out each phase and how to finish them below:
Phase 1
This phase is the biggest one in the game and matters the most. Here the Chef will test your dodging skill by throwing all kinds of food at you. Just avoid or parry the sugar cubes, dodge the strawberries, jump above the limes and shoot down the crackers from the sky.
Moreover, there will also be a flame on the top of the screen that will come down to damage you. So damage him, be careful what kind of food he throws at you, and use dodge, jump, and shoot actions depending on that.
Phase 2
In Phase 2, he will take you in the palm of his hand, and here, you will need to damage the pepper shakers. Just keep damaging the pepper shakers, and eventually, they will go back to the Chef, deal lots of damage to him, and get you to the 3rd phase. During Phase 2, remember to avoid or parry anything coming your way after he sneezes.
Phase 3
In Phase 3, damage the Salt dancers and avoid the buzzsaw on the floor. This phase is a pretty straight-up part of the boss fight where you will have to do only two things, including damage and avoiding the saw.
Phase 4
Inside the last phase of the game, you will need to move around using the platforms and parry the Chef. Once you parry him successfully, shoot his heart till he is defeated, and you have completed the Cuphead DLC.
King’s Leap Bosses
Inside King’s Leap, you will come across five different bosses you will have to defeat. It is like a reference to chess, where you will have to defeat the Pawns, Knight, Bishop, Rook, and Queen.
Chess Pawns

First, the fight will start with the Pawns, just parry them and shoot them till they lose their heads.
Chess Knight

As for the Knight, parry him and avoid his slash and charge attacks. Use distance to your advantage and damage him from afar, and you will be good.
Chess Bishop

For the Bishop, first put out the candles and then go on and parry the Bishop. Then, continue parrying him and shooting him until his health breaks down.
Chess Rook

When the Rook comes, make sure you dodge the heads he will send at you and parry the pink color heads. Parrying the ones with pink color to send them back to him and damage him. Repeat this several times, and he will be good as dead.
Chess Queen

The last one to beat is the Queen, with her parry the fuses on the cannon as they are lined up to her. It will damage her since you cannot damage her using your guns. Make sure you avoid falling eggs and use the cannon to defeat her.
The Devil and Angel Secret Boss

You will find seven bosses in the game, and if you are looking for more bosses, the Cuphead DLC offers more things. This boss only has one phase, and you will have to damage the Devil and avoid his beams and projectiles. The Angel and Devil can shift positions quickly so that this fight can become tough, but it is easy since only one of the attacks takes damage.
Read More: Metal Max Xeno Reborn: Combat Guide