


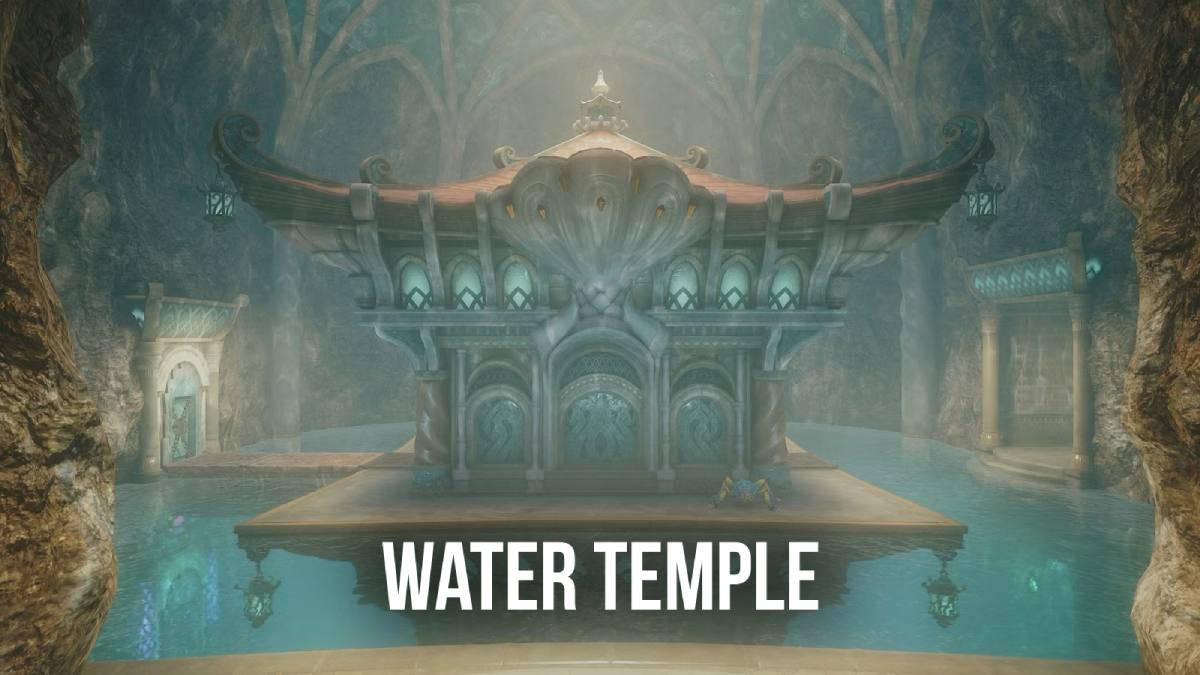
The Water Temple is easily one of the most infamous dungeons in The Legend of Zelda: Ocarina of Time. Between constantly changing water levels, hidden Small Keys, confusing underwater passages, and the dreaded Dark Link encounter, this dungeon has frustrated Zelda players for decades.
Fortunately, the Nintendo Switch 2 remake introduces several improvements that make navigating the Water Temple much easier. The Iron Boots are quicker to equip, some rooms have been redesigned to improve visibility, and the number of Small Keys required for progression has been reduced.
However, the dungeon still has plenty of tricky puzzles, and missing a key can leave you wandering around for longer than you’d like.
This Ocarina of Time Remake Water Temple walkthrough covers everything you need to complete the dungeon, including how to enter, all four Small Key locations, water-level puzzles, the Longshot, Dark Link, Morpha, and the changes Nintendo made to the original experience.
In Brief
- Entry requirements: You’ll need the Iron Boots, Zora Tunic, Hookshot, and Serenade of Water to enter the Water Temple beneath Lake Hylia.
- Four Small Keys: The remake features a shorter four-key progression route, with several key locations changed from the original Nintendo 64 version.
- Main puzzles and bosses: You’ll need to manipulate three water levels, navigate underwater passages, defeat Dark Link, and obtain the Longshot before facing Morpha.
- Remake improvements: Faster Iron Boots switching, clearer navigation, improved room visibility, and adjusted layouts make the dungeon easier to explore.
How to Enter the Water Temple in Ocarina of Time Remake
Before entering the Water Temple, you’ll need to complete the Ice Cavern and obtain several essential items.
Water Temple Required Items
| Item | How to Obtain | Purpose |
|---|---|---|
| Iron Boots | Ice Cavern | Sink underwater and explore submerged passages |
| Zora Tunic | Free King Zora using Blue Fire | Stay underwater without running out of air |
| Hookshot | Dampé’s Grave | Activate switches and reach distant platforms |
| Fairy Bow | Forest Temple | Activate eye switches and solve torch puzzles |
| Bombs | Dodongo’s Cavern | Destroy cracked walls |
| Zelda’s Lullaby | Impa at Hyrule Castle | Change the temple’s water levels |
| Serenade of Water | Sheik after Ice Cavern | Warp to Lake Hylia |
Optional but useful: Din’s Fire, a few bottled fairies, and the Megaton Hammer.
How to Get the Iron Boots and Zora Tunic
First, travel to Zora’s Domain as Adult Link.
The region is now frozen, and King Zora is trapped inside a large block of red ice.
Head toward Zora’s Fountain and enter the Ice Cavern.
Inside, you’ll need to solve several ice puzzles and defeat a White Wolfos to obtain the Iron Boots.
Before leaving, collect some Blue Fire inside an Empty Bottle.
Return to King Zora and use the Blue Fire to melt the ice surrounding him.
He’ll reward you with the Zora Tunic.
With both items collected, you’re ready to enter the Water Temple.
Finding the Water Temple Entrance
- Play the Serenade of Water to travel directly to Lake Hylia.
- Head toward the remaining pool of water near the lake’s central island.
- Equip the Iron Boots to sink underwater.
- Locate the large stone doorway at the bottom.
- Use the Hookshot to activate the switch above the entrance.
- Once the gate opens, swim inside.
You’ll now enter the Water Temple.
How the Water Temple Water-Level Puzzle Works
Before exploring the dungeon, it’s important to understand its central mechanic.
The Water Temple contains three water levels, each controlled by playing Zelda’s Lullaby in front of a Triforce symbol.
Changing the water level allows Link to access doors, platforms, switches, and passages that were previously underwater or out of reach.
The remake also uses colored environmental markers to make these controls easier to locate.
| Water Level | Control Location | Visual Clue |
|---|---|---|
| Lowest, 1F | Upper section of Princess Ruto’s chamber | Blue-lit path |
| Middle, 2F | Inside the central pillar | Green-lit path |
| Highest, 3F | Upper western passage reached using a water lift | Pink-lit path |
The game doesn’t require you to use these controls in a fixed sequence throughout the entire dungeon.
However, following the correct order will save you from unnecessary backtracking.
Tip: Whenever you get lost, return to the large central chamber and check which floor the water currently reaches. Then follow the colored path toward the water-level control you need.
For the song’s Nintendo Switch 2 button inputs, check our Ocarina of Time All 12 Songs and Locations guide.
Water Temple Walkthrough: All Four Small Keys and Puzzles
The remake’s main route requires collecting four Small Keys.
Unlike the original game, where players needed to find six, several previously important rooms now contain optional rewards instead.
Here’s the recommended progression through the Water Temple.
Step 1: Meet Princess Ruto and Lower the Water Level
When you first enter, you’ll reach a massive central chamber with a large pillar in the middle.
The room is almost completely flooded.
Start by equipping the Iron Boots and sinking to the bottom floor.
Enter the passage leading toward Princess Ruto.
After meeting her, a short conversation will explain the temple’s situation.
Get the Dungeon Map
Once the conversation ends:
- Remove the Iron Boots and float upward through the vertical passage.
- Continue until you reach the upper floor.
- Find the treasure chest containing the Dungeon Map.
- Approach the nearby Triforce symbol.
- Play Zelda’s Lullaby.
The water will drain to the lowest level, revealing several previously submerged passages.
You can now explore the first floor more easily.
Step 2: Find Small Key #1 in the Torch Room
After lowering the water, drop back into the chamber where you first met Ruto.
You’ll notice a locked passage with unlit torches nearby.
To open it, you’ll need to light the torches.
How to Solve the Torch Puzzle
- Stand behind the already-lit torch.
- Equip the Fairy Bow.
- Shoot arrows through the flame toward the unlit torches.
- Light both torches to unlock the door.
Alternatively, you can use Din’s Fire to light the torches at once.
Enter the newly opened room.
Inside, you’ll encounter several Spikes, the round enemies that extend sharp points when approached.
Use the Hookshot to stun or defeat them, or attack whenever they expose their vulnerable bodies.
Once every enemy has been defeated, a treasure chest will appear.
Open it to collect Small Key #1.
Step 3: Get the Compass
Return to the main central chamber, with the water still at its lowest setting.
Look for the cracked wall leading into a submerged passage on the lower floor.
Destroy the wall using a bomb.
Equip the Iron Boots and follow the underwater corridor.
You’ll encounter Shell Blades, which can be defeated with the Hookshot when they open their shells.
At the end of the passage, remove the Iron Boots to float toward the surface.
Use the Hookshot targets to climb through the next room.
Defeat the enemies blocking your path, including the Like Like, and continue toward the treasure chest.
Open it to obtain the Compass.
The Compass is optional for progression, but it’s useful for tracking treasure chests and identifying important rooms.
Return to the main central chamber afterward.
Step 4: Find Small Key #2 in the Dragon Statue Room
With the water still lowered, explore the western passage on the bottom floor.
You’ll notice a large movable block.
Push the block forward until it drops into the water.
Follow it by equipping the Iron Boots.
Defeat or avoid the Shell Blade in the underwater corridor, then remove the boots to float upward at the other end.
You’ll enter a chamber containing a dragon statue and a whirlpool.
How to Solve the Dragon Statue Puzzle
- Jump into the water and equip the Iron Boots.
- Land on the stone structure forming the dragon’s body.
- Aim your Hookshot at the switch inside the dragon’s mouth.
- Activate the switch to open the underwater gate.
- Remove the Iron Boots and swim toward the opening.
- Equip them again to pass through the gate.
- Defeat the Shell Blades guarding the passage.
- Swim upward to reach the treasure chest.
Open the chest to obtain Small Key #2.
You should now have two Small Keys.
Return to the central chamber.
Step 5: Raise the Water to the Middle Level
Head toward the locked door at the base of the large central pillar.
Use one of your Small Keys to open it.
Inside, turn around and look upward.
You’ll see a Hookshot target leading to an elevated platform.
Use the Hookshot to reach it.
Approach the Triforce symbol and play Zelda’s Lullaby.
The water will rise to the middle level, covering the first floor.
Don’t Miss the Hidden Basement Passage
When the water rises, a floating platform inside the central pillar moves upward.
This reveals a hidden underwater passage beneath it.
In the original game, this was an important location because it contained an easily missed Small Key.
However, the remake changes its reward.
You can still explore the passage for optional collectibles, including a Gold Skulltula.
To reach it:
- Equip the Iron Boots and sink beneath the floating platform.
- Follow the passage into the basement.
- Activate the overhead switch.
- Defeat the enemies that appear.
- Swim upward through the newly opened passage.
- Collect the optional treasure and Gold Skulltula.
Return to the central pillar when you’re finished.
Step 6: Find Small Key #3 on the Second Floor
With the water at the middle level, return to the main central chamber.
Head toward the eastern passage with the cracked wall.
Destroy it using a bomb or the Megaton Hammer.
You’ll uncover an underwater corridor filled with Stingers.
Equip the Iron Boots and move through the passage carefully.
Use the Hookshot to eliminate the enemies along the way.
At the end, remove the boots to float into a room containing a water-powered platform.
How to Solve the Water Lift Puzzle
You’ll notice a switch that controls the water pushing a circular platform upward.
To complete the puzzle:
- Shoot the switch with the Hookshot to lower the water lift.
- Stand on the circular platform.
- Shoot the switch again.
- Ride the platform upward.
- Step onto the upper ledge.
- Open the treasure chest.
You’ll receive Small Key #3.
Return to the main chamber.
Step 7: Raise the Water to the Highest Level
Your next objective is to raise the water to the third floor.
Look for the locked western passage surrounded by pink-lit architectural markers.
Use a Small Key to open it.
Inside, you’ll find another water-powered lift.
Activate the switch to lower the platform.
Defeat the Blue Tektite nearby, then stand on the lift.
Hit the switch again to rise toward the upper section.
At the top, you’ll discover another Triforce symbol.
Play Zelda’s Lullaby to raise the water to its maximum height.
The central chamber is now fully flooded, and new passages on the third floor are accessible.
Step 8: Complete the Moving Platforms and Dragon Head Puzzle
With the water at its highest level, head toward the locked western door on the upper floor.
Use your remaining Small Key to enter.
You’ll find a room containing moving platforms and a waterfall.
How to Cross the Moving Platforms
Use the Hookshot to pull yourself between the platforms.
Each platform moves, so wait until its target is within reach before firing.
Continue climbing until you reach the upper doorway.
In the next room, you’ll encounter a more complicated puzzle involving movable dragon-head platforms and a central switch.
How to Solve the Dragon Head Puzzle
Follow this sequence:
- Activate the central switch to raise the dragon-head platforms.
- Use the Hookshot to reach the southwestern side.
- Hit the switch again to lower the platforms.
- Use the nearby Hookshot target to reach the next ledge.
- Activate the switch to raise the dragon heads again.
- Hookshot toward the northwestern dragon.
- Lower the platforms and climb onto the dragon’s head.
- Activate the switch again to reach the final doorway.
Blue Tektites may appear during this section.
Defeat them whenever possible so they don’t knock you into the water.
Once the puzzle is complete, continue through the doorway.
You’ll eventually reach a strange room covered in white mist, with a solitary tree in the middle.
This is where you’ll encounter Dark Link.
How to Defeat Dark Link in the Water Temple
Boss type: Mini-boss
Location: Misty chamber beyond the dragon-head puzzle
Reward: Access to the Longshot
Dark Link is one of the most memorable encounters in Ocarina of Time.
The mysterious opponent mirrors Link’s appearance and uses many of the same sword techniques.
At first, the room appears empty.
Walk toward the tree and continue exploring until Dark Link appears.
Best Strategy to Beat Dark Link
Dark Link can block, dodge, and counter many standard sword attacks.
Constantly swinging your sword makes the fight harder because he’ll frequently react to your movements.
Instead, try these approaches:
- Use Din’s Fire: This magic attack can damage Dark Link without requiring a conventional sword strike.
- Watch his attacks: Block his sword swings and look for openings to counterattack.
- Avoid predictable attacks: Repeatedly using the same sword technique makes it easier for him to defend.
- Keep some distance: Give yourself enough room to react to his movements.
- Use healing items: If you’re struggling, bottled fairies or potions can help you survive.
Din’s Fire is particularly effective if you collected it from the Great Fairy Fountain on Death Mountain.
After defeating Dark Link, the mist will clear, and a new doorway will become accessible.
Proceed through it to collect your next major item.
Step 9: Get the Longshot
After defeating Dark Link, enter the room beyond the boss arena.
Open the large treasure chest to obtain the Longshot.
The Longshot is an upgraded version of the Hookshot that allows Link to grab targets from much greater distances.
It becomes essential for reaching several remaining sections of the Water Temple.
What the Longshot Does
- Reaches targets that are too far away for the regular Hookshot.
- Pulls Link toward distant wooden and metal grapple points.
- Activates certain switches from farther away.
- Helps retrieve Gold Skulltula Tokens.
- Plays an important role in the Morpha boss encounter.
How to Escape the Longshot Room
After collecting the Longshot, continue through the passage leading toward the underground river.
You’ll find a series of whirlpools pulling the water downstream.
Use the Iron Boots to avoid getting dragged into the whirlpools.
Follow the passage until you reach a platform with an eye switch near a barred gate.
Shoot the eye switch to open the gate.
Immediately use the Longshot to pull yourself toward the target beyond it before the gate closes.
This route eventually leads back toward the central chamber.
Step 10: Find Small Key #4
With the Longshot acquired, you’ll need to return the water level to its middle setting.
This requires visiting the original blue-lit water control to lower the water completely, followed by the green-lit control inside the central pillar.
Once the water reaches the second floor, return to the main chamber.
Look for the eye switch above a barred passage on the northern side.
How to Solve the Eye Switch Puzzle
- Shoot the eye switch with the Fairy Bow.
- The nearby gate will open temporarily.
- Quickly target the Hookshot point beyond the gate using the Longshot.
- Pull yourself through before the gate closes.
You’ll enter another underwater section containing a movable block.
This puzzle requires approaching the block from both sides.
How to Move the Block and Get the Key
First, sink underwater using the Iron Boots.
Follow the passage until you reach the block embedded in the wall.
Pull it outward as far as possible.
Now leave the underwater passage and return through the alternate route, using the ceiling Hookshot target to reposition yourself.
Approach the block from the opposite side.
Push it until the passage becomes accessible.
Continue through the newly opened route and locate the treasure chest.
Open it to collect Small Key #4, the final Small Key required for the main route.
All Four Water Temple Small Key Locations
If you’re missing a Small Key, use this quick-reference table before continuing.
| Key | Location | How to Obtain |
|---|---|---|
| Small Key #1 | 1F, Princess Ruto’s torch chamber | Light the torches and defeat the Spikes |
| Small Key #2 | 1F, western dragon statue room | Activate the underwater switch and pass through the gate |
| Small Key #3 | 2F, eastern flooded passage | Destroy the cracked wall and ride the water lift |
| Small Key #4 | 2F, northern eye-switch passage | Use the Longshot and move the underwater block |
Remember that Small Keys disappear from your inventory when used to unlock doors.
The table tracks where each key is collected, rather than how many you should currently have in your inventory.
Step 11: Find the Water Temple Boss Key
With the final Small Key collected, you’re ready to obtain the Boss Key.
Keep the water at its middle level.
Return to the main chamber and equip the Iron Boots to reach the northern passage on the first floor.
You’ll encounter a locked door.
Use your final Small Key to open it.
How to Complete the Rolling Boulder and Current Puzzle
Inside, you’ll enter a large chamber containing strong water currents, moving boulders, and Blue Tektites.
Defeat the Tektites before attempting to cross.
Use the Iron Boots whenever necessary to avoid being pulled into dangerous currents.
Continue into the next chamber.
You’ll find several cracked walls and a large movable block.
Destroy the cracked walls with bombs or the Megaton Hammer.
Move the stone block through the newly opened passage until it rests on the underwater floor switch.
This raises the water level inside the room, allowing you to reach the upper doorway.
Cross the Rising Platforms
The next room contains three water-powered platforms.
Activate the switch controlling them.
Carefully jump across the raised platforms while avoiding the Blue Tektites.
Once you’ve reached the other side, continue into the corridor containing rolling boulders.
Wait for a boulder to pass before entering the stream.
Move beneath the waterfall and take the side passage.
Defeat the Shell Blade blocking your route, then proceed toward the final treasure chest.
Open it to obtain the Boss Key.
You now have everything required to reach Morpha.
Step 12: How to Reach the Water Temple Boss Room
Return to the main central chamber.
You’ll need to raise the water back to its highest level.
Follow the pink-lit passage toward the upper Triforce symbol.
Play Zelda’s Lullaby to raise the water to the third floor.
Once the water has risen, look for the northern doorway near the top of the central chamber.
Use the Longshot to reach the entrance.
You’ll encounter a passage containing moving spike traps and water flowing down the steps.
Equip the Iron Boots to make crossing easier.
Time your movements carefully and avoid the traps.
At the end of the passage, you’ll reach the large locked boss door.
Use the Boss Key to enter.
How to Defeat Morpha in the Water Temple
Boss: Morpha
Location: Water Temple final chamber
Recommended equipment: Longshot, Master Sword, Zora Tunic
Rewards: Heart Container and Water Medallion
Morpha is a giant water-based creature that attacks by manipulating the water inside the boss arena.
Its true body is a small red nucleus that moves through large tentacles extending from the surrounding pool.
The key to defeating Morpha is pulling its nucleus out of the water and attacking it before it escapes.
Morpha Boss Fight Strategy
Follow these steps:
- Stay near the edge of the arena and keep Morpha targeted.
- Watch the water carefully as tentacles begin forming.
- Wait until the red nucleus moves into an exposed tentacle.
- Use the Longshot to pull the nucleus out of the water.
- Quickly attack it with the Master Sword.
- Retreat before the tentacles recover.
- Repeat until Morpha is defeated.
As the battle progresses, Morpha becomes more aggressive.
Additional tentacles appear, and they can block your movement or attempt to grab Link.
Tips to Beat Morpha Easily
Stay out of the water. Falling into the pool makes it harder to avoid Morpha’s attacks.
Watch the nucleus. The red core is your target. Attacking empty tentacles won’t damage the boss.
Use the Longshot from a safe distance. You can pull the core toward Link without standing directly beside the tentacles.
Watch for multiple tentacles. Later in the fight, Morpha can create additional hazards around the arena.
Use the grapple points around the arena. If you become trapped, these can help you escape dangerous positions.
Once Morpha has been defeated, collect the Heart Container that appears.
Enter the blue warp portal to complete the dungeon.
After the following story sequence, you’ll receive the Water Medallion from Princess Ruto.
Lake Hylia will also return to its normal water level.
All Five Gold Skulltula Locations in the Water Temple
If you’re going for 100% completion, there are five Gold Skulltulas to collect inside the Water Temple.
You can collect all five during your first visit, although some require the Longshot.
| Location | Required Equipment | How to Find |
|---|---|---|
| Central pillar basement | Iron Boots, Hookshot | Follow the passage beneath the floating platform after raising the water |
| Central pillar upper section | Longshot | Look above the upper platform for a distant Skulltula |
| Eastern flooded passage | Bombs, Hookshot | Destroy the cracked wall near the middle water level |
| Whirlpool river | Longshot, Iron Boots | Check the wall above the water while traveling through the rapids |
| Rolling boulder passage | Longshot | Look above the waterfall near the Boss Key route |
For the rest of Hyrule’s collectibles, check our All 100 Gold Skulltula Locations and Rewards guide.
What Changed in the Ocarina of Time Remake Water Temple?
Nintendo has made several changes to the Water Temple in the Switch 2 remake.
While the dungeon’s central mechanics remain familiar, exploring its interconnected rooms is considerably more convenient.
1. Iron Boots Can Be Equipped Instantly
In the original Nintendo 64 version, switching the Iron Boots required opening the equipment menu.
Players had to repeat this process constantly while exploring underwater passages.
The remake allows you to toggle the Iron Boots using the directional controls.
This makes diving and resurfacing significantly faster.
2. Some Walls Have Been Replaced With Lattice Structures
Nintendo has redesigned certain solid walls using lattice-style structures.
These allow players to see into neighboring rooms, making the dungeon’s layout easier to understand.
This is particularly useful when exploring the central chamber, where multiple floors connect through underwater passages.
3. Fewer Small Keys Are Required
The original Water Temple had six Small Keys.
The Switch 2 remake reduces the main route to four.
One of the most notable changes involves the hidden basement passage beneath the central pillar.
Previously, players needed to explore this passage to obtain a Small Key.
In the remake, it contains optional rewards, including a Gold Skulltula.
4. Improved Navigation and Environmental Clues
The remake uses clearer environmental markers to help players understand where certain paths lead.
The different water-level controls are easier to identify using their colored surroundings.
Several rooms also feature adjusted object placement to make puzzles more intuitive.
5. Modern Camera and Movement Controls
The remake introduces freely adjustable camera controls and manual jumping.
These changes make it easier to inspect distant platforms, locate switches, and navigate complicated environments.
Players also have more control when moving across ledges and navigating the dungeon’s vertical sections.
6. The Main Water-Level Mechanics Remain
Despite the improvements, the Water Temple still revolves around the same basic puzzle.
You’ll need to change the water level between three different heights, revisit previously explored rooms, and use your equipment to unlock new paths.
Dark Link and Morpha also remain the dungeon’s main encounters.
The remake updates their presentation while preserving the core strategies of the original fights.
What to Do After Beating the Water Temple
After defeating Morpha, you’ll return to Lake Hylia.
The lake will have been restored, opening additional exploration opportunities.
Before leaving, you should consider collecting the Fire Arrows.
How to Get Fire Arrows in Lake Hylia
Once you’ve completed the Water Temple, look for the stone plaque near the island where you reappear.
The inscription provides a clue about shooting an arrow toward the morning light.
To solve the puzzle:
- Wait until sunrise.
- Stand near the stone plaque.
- Equip the Fairy Bow.
- Aim directly toward the rising sun.
- Shoot an arrow.
If performed correctly, the Fire Arrows will appear on a nearby platform.
Swim across and collect them.
Fire Arrows are useful for several puzzles and encounters later in the adventure.
Where to Go Next
With the Water Medallion collected, your next major destination is Kakariko Village.
You’ll need to progress through the events leading to the Shadow Temple.
This involves obtaining the Lens of Truth from the Bottom of the Well and learning the Nocturne of Shadow.
For the complete dungeon order and main story progression, check our Ocarina of Time Remake Complete Walkthrough.
Frequently Asked Questions
How many Small Keys are in the Water Temple Remake?
The Nintendo Switch 2 remake features four Small Keys on the main dungeon route.
This is fewer than the six Small Keys in the original Nintendo 64 version.
Where is the hidden key in the central pillar?
In the original game, a Small Key was hidden in the basement beneath the central pillar.
In the remake, this area contains optional rewards rather than a required key.
How do you change the water level in the Water Temple?
Find a Triforce symbol and play Zelda’s Lullaby.
There are three water-level controls, each setting the water to a different height.
How do you get the Longshot?
Complete the moving-platform and dragon-head puzzles on the upper floor, then defeat Dark Link.
The Longshot is found in the treasure chest immediately after the mini-boss encounter.
How do you beat Dark Link?
Use Din’s Fire for a straightforward way to deal damage, or defend against his sword attacks and counter when an opening appears.
Avoid repeatedly using predictable attacks that he can block.
How do you defeat Morpha?
Use the Longshot to pull Morpha’s red nucleus out of its water tentacles.
Attack the exposed core with your sword and repeat until the boss is defeated.
How many Gold Skulltulas are in the Water Temple?
There are five Gold Skulltulas hidden throughout the Water Temple.
Some require the Longshot to collect.
Is the Water Temple easier in the remake?
Yes. Nintendo has improved equipment switching, adjusted some room layouts, introduced clearer visual cues, and reduced the number of required Small Keys.
However, the dungeon still features its original three-level water system and several challenging puzzles.
The Water Temple remains one of the more complicated dungeons in The Legend of Zelda: Ocarina of Time Remake, but Nintendo has made several welcome improvements to its design.
With faster Iron Boots switching, clearer environmental clues, and fewer Small Keys to collect, players should have an easier time navigating the temple compared to the original version.
The most important thing is to remember the three water-level controls and follow the correct progression through the dungeon.
Collect the four Small Keys, defeat Dark Link to obtain the Longshot, solve the final underwater puzzles, and secure the Boss Key before facing Morpha.
Once you’ve defeated Morpha and received the Water Medallion, you’ll be ready to continue Link’s adventure toward the Shadow Temple.