


Jump-throw bind was a fundamental feature in CS:GO’s Competitive meta, which Valve has removed in Counter-Strike 2. However, there is a way you can add the Jumpbind back to your arsenal in CS2.
A jump bind is a simple feature that evolved from CS:GO. You need to execute certain commands consecutively in order to complete a jump throw. The commands assign two separate activities, one for jumping and the other for throwing the nade. The assigned key bind then runs both of these together, creating a consistent throw every time.
Counter-Strike is a game where precision matters. Your nades had to be consistent, and for that, you needed a jump bind in Global Offensive due to the inherent inconsistency of manually jumping. Even a half-second difference between your throws will result in your lineup missing. By introducing a jump bind, players could be consistent with the press of a single button.
So when Valve initially removed the ability to have multi-binds in Counter-Strike 2, players were concerned about the consistency of their lineups. Valve quickly addressed the community, saying jump throws are now native and consistent, and there is no longer a need to set up a jump-throw bind.
Read More: How to Bind Noclip or Use Ghost Mode in Counter-Strike 2
How to Jump Throw in Counter-Strike 2
Jump throws in CS2 are now built into the game. This means you don’t need a jump-throw bind to consistently land a smoke or flash in the same position. However, there is now a time window of around 200 milliseconds where you have to press the Jump and Mouse 1 buttons together to make the jump-throw work consistently every single time.
But how will you know if your jump throws are working? Well, when you properly execute a jump throw, your character makes a grunting noise as an audio cue that your throw is correct. It takes a little bit of time to master the jump-throw in CS2. But it eventually becomes part of your muscle memory.
The new jump-throw feature in CS2 eliminates the need for a separate key bind, which we believe is Valves’s intention to allow newer players to get up to speed with the mechanics of the new game.
Can I Use a Single Jump-throw Bind in CS2 Just Like CS:GO?
Normally, it shouldn’t be possible to use the jump-throw command in CS2, as Valve has already made it easier for players to make consistent jump-throws without a single bind. However, for some players, it may still seem difficult to master CS2’s way of using jump-throw.
For those players, there’s still a way! Apparently, a Reddit user named u/ulandan94 found a way to make a single jump-throw bind work in CS2. Although it doesn’t follow the same method we used to bind jump-throw in CS: GO, it definitely works.
Follow this step-by-step guide to bind a single button to consistently jump-throw every single time in Counter-Strike 2:
1. Create your config file
Every command in Counter-Strike goes through a config (or cfg) file. To create this jump-throw bind, you will need to make a config file as well.
- The first step to creating the config file will be to create a Text Document by right-clicking anywhere on your Desktop or any Directory.
- After that, a New Text Document file will be created.
- Now, copy the commands given below and paste them into the New Text Document file.
alias "+jumpaction" "+jump;"
alias "+throwaction" "-attack; -attack2"
alias "-jumpaction" "-jump"
bind v "+jumpaction;+throwaction;"

alias "+runthrow" "+forward;+jump;"
alias "-runthrow" "-jump;-forward"
bind h "+runthrow;+throwaction" - Rename the file to anything and save. Example: Jbind
- Finally, replace the file extension type from “.txt” to “.cfg” Example: Jbind.cfg
You can replace the letters “v” and “h” with your convenient choices for a jump throw and a run throw respectively. The rest of the commands specify each part of the sequence and don’t need to be changed.

2. Acess the Local Files
Now that you have your config file set up, it is time to place it in the right folder. You will need to access the local files for CS2.
- Right-click CS:GO in your Steam’s Game Library and select properties.

- Go to “Installed Files” and then on “Browse” to access your local installation folder.

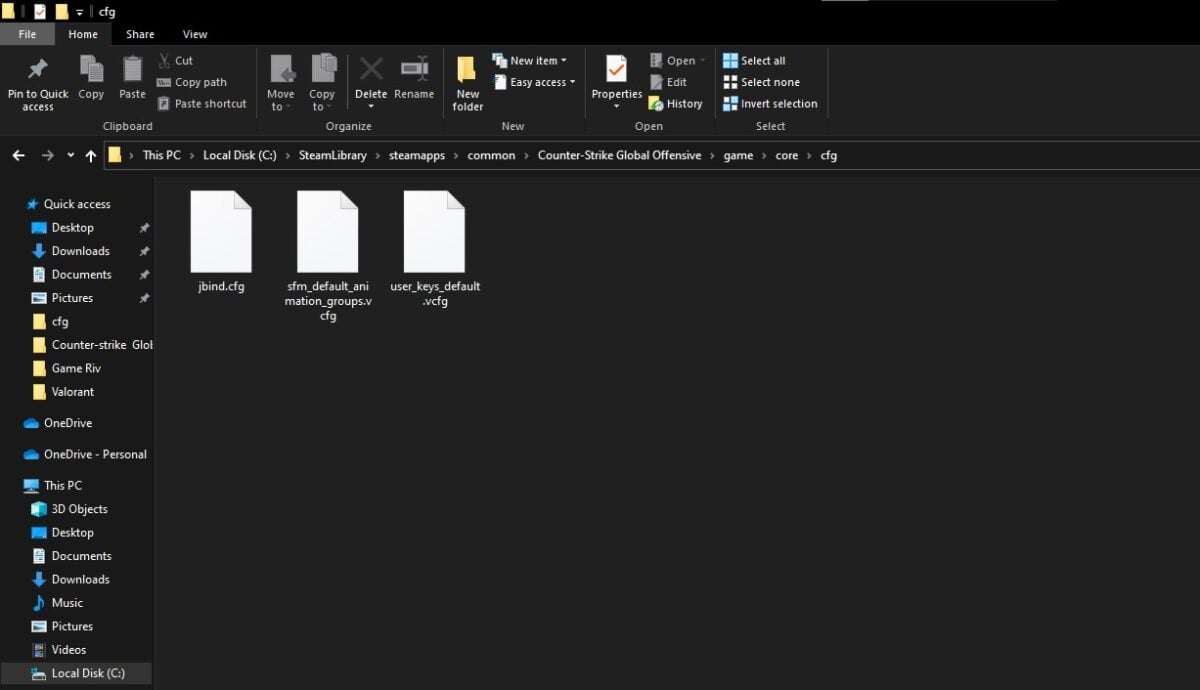
- Go into the “Game” -> “Core” -> “cfg”
- Copy the config file you created before into this folder.
3. Executing the Config file in Game
Before you can test out your new Jump Throw bind, you will have to execute the config in-game. Since the game is still in closed beta, you will need to do this step each time until the game has its own launch options. After which, you can set up the launch option to run it for you each time you start the game
- Access the Console in the Game using the “~” button

- write “exec <config file name>” in the console.

Read More: G2 NiKo Thinks the Responsive Smokes is a Bad Addition to the Game and Might Get Removed
While Valve still decides what they want from Counter-Strike 2, the community will no doubt adjust what they know about the game and try to take every bit of an advantage they can. Jump throw binds may be removed or banned altogether but until they are, you can use them for consistent lineups without having to worry about the in-game skill check!