

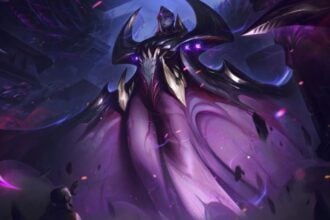
Crimson Desert does not mess around when it comes to boss fights. Some of them are straight-up duel checks, some are giant spectacle battles, and some flip the rules entirely with puzzle mechanics, phase changes, and skill-specific counters. As of April 10, 2026, the game features 76 bosses in total across the main story and optional content, but the fights most players get stuck on are the major story bosses and the late-game skill checks that demand you understand the game’s combat systems instead of just swinging wildly.
The good news is that most of Crimson Desert’s toughest bosses do have clear answers once you know what the fight is actually asking from you. Some want parries. Some want grapples. Some want Blinding Flash, Force Palm, Nature’s Snare, or even a specific traversal move. That is what makes this boss guide useful, because the hard part is usually not raw damage. It is spotting the boss’s real weak point before the fight drags on too long.
The best general boss tips before every big fight
Before getting into specific bosses, it is worth locking in a few universal rules. You should bring large stacks of Grilled Meat to major encounters because healing is frequent, fast, and often the difference between surviving a long boss chain and getting wiped out. Also, note that human bosses tend to reward parries, shield users usually need heavy attacks to crack guard, and upgrading armor early matters a lot because Crimson Desert does not really punish you for wearing heavier protection.
A lot of the tougher late-game encounters are less about perfect execution and more about using the correct counter tool at the correct time. If a boss is bullying you, the answer is often not level grinding. It is usually that you are ignoring the move the fight was built around.
All Bosses & How to Beat Them:
| Boss | How to Beat | Main Weak Point | Rewards |
|---|---|---|---|
| Matthias | Learn his Pump Kick with Watch and Learn, then use it against him. Stay patient and punish after his combos finish. | Long recovery after attack strings. | Pump Kick. |
| Kailok the Hornsplitter | His counter follow-up can be shut down with Force Palm. | His counter follow up can be shut down with Force Palm. | Sword of the Lord, Seal of Greed, Iron Ore. |
| Reed Devil | In phase one, parry and punish. In phase two, destroy all 5 totems first because he becomes invincible until they are gone. | The totems are the real weak point in phase two. | Sunset Reed Cloth Gloves, Swift Stab. |
| Tenebrum | Glide and land Force Palm hits mid air. The fight is built around aerial positioning more than standard melee pressure. | Vulnerable during airborne Force Palm opportunities. | Key to the Spire of the Stars. |
| Kearush the Slayer | Get behind him with Back Hang and stab repeatedly. Use wall grapples to avoid heavy slam attacks. | His back is much less protected than his front. | The Grove’s Thorn, Gale I, Howling of Chaos. |
| Crowcaller | Use grappling attacks to build stagger, then unload damage with Turning Slash. Aerial Force Palm helps avoid Shadow Dance. | Stagger bar. Once staggered, he becomes much easier to burst down. | Blackwing Leather Armor, Blackwing Mask, Tauria Curved Sword. |
| Cassius Morten | Use Nature’s Grasp on broken pillars and swing them into him for massive damage. Let the arena work for you. | The broken pillars in the arena. | Shield of Betrayal. |
| Ludvig | Build stagger early with Lariat Follow Up. In phase two, use Nature’s Snare to answer lightning projectiles and Blinding Flash to interrupt. | Vulnerable to interruptions and stagger pressure. | Hungering Fang Leather Cloak, Hungering Fang Leather Boots. |
| One Armed Ludvig | Time Quick Grab as a parry to knock him down and deal heavy stagger damage. | His offense can be turned against him with parry timing. | No major named reward clearly listed in current guide summaries. |
| Fortain the Cursed Knight | Use Blinding Flash and Blinding Flash Finisher for damage. Manage Spirit carefully and interrupt his big summon attempts with Force Palm when possible. | Interruption windows before spirit attacks fully start. | Shackle of Might, Abyss Artifact, Demeniss Refinement Token. |
| Lucian Bastier | Parry and dodge in phase one, then play more at range in phase two and use Smite. Blinding Flash can interrupt some combos. | Weak to adapting your plan between phases rather than playing one style throughout. | Official Knight’s Plate Armor, Official Knight’s Leather Boots, Official Knight’s Leather Gloves, Eclipsed Solas Plate Gloves, Spire of Clockwork Key. |
| T’rukan the Ascended | Stay close, dodge or parry strings, then reposition behind him after combos. Do not overcommit. | Open after long attack strings. | Wooden Mask of Lost Justice, Wanderer of Faith Leather Gloves, T’rukan’s Fighting Spirit. |
| Goyen | Use sweeps to interrupt him and Aerial Roll to avoid his aerial pressure. Keep him from dictating the pace. | Can be interrupted before his offense fully starts. | Parry his melee strings, hit him briefly, then use Force Palm on his red glint follow-up to stagger him. Dodge wind slashes sideways. |
| Lava Myurdin | Use grappling skills in the early phase and wear fire-resistant armor later in the fight. | Easier to control with mobility and fire resistance prep. | Melted Ambition, Pailunese Contribution EXP. |
| Umbra | This is a mounted dragon-style finale. Stagger Umbra first, then move in close enough to land Force Palm hits. Avoid rocks and laser attacks while repositioning. | Stagger windows during the spectacle phases. | Final boss progression rewards are tied to story completion rather than a simple gear drop list in current summaries. |
Which boss rewards are actually worth getting excited about?
A few boss rewards stand out more than the others. Reed Devil’s Sunset Reed Cloth Gloves remain notable because they are one of the better armor pieces in the game, thanks to the innate Slashing Reed skill.
Crowcaller’s Blackwing set is also valuable, as the Blackwing Leather Armor is one of the better chest pieces thanks to its defense and three Abyss Gear slots. Lucian’s win is huge for progression because the Spire of Clockwork Key opens the way to important late-game content.
So while some bosses are just there to test you, others really do pay off in a big way. If you are planning your route through the game, those are some of the fights that feel especially worth mastering instead of barely surviving.
Crimson Desert’s boss design is at its best when it forces you to stop brute-forcing and start paying attention. Hornsplitter wants Force Palm. Reed Devil wants you to kill the totems. Tenebrum wants aerial Force Palm pressure. Crowcaller wants stagger. Fortain and Lucian want you to use the right utility skill at the right time. By the time you hit Goyen and Umbra, the game is basically asking whether you have actually learned anything from the long road getting there.
That is what makes this game’s biggest fights memorable. They are hard, sure, but most of them are not unfair. They just hide the answer until you slow down enough to see it.