
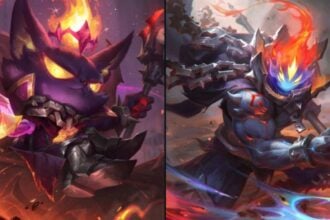


Here is how you can defeat all the bosses in Salt And Sacrifice.
Salt and Sacrifice is now out on PS5, PS4, and PC for everyone to play and enjoy. It attracts such a vast pool of gamers due to its fusion of genres. Inside the game, you get on an epic adventure making your way through all kinds of bosses, collecting items, and meeting different people.
However, with such a big crossover of so many genres, it can sometimes be challenging to finish the game. Boss fights in games like these can turn out a menace sometimes. So below, we have made a complete guide on defeating all the bosses in Salt and Sacrifice.
Read More: All Classes in Salt and Sacrifice
How to Defeat All The Bosses In Salt And Sacrifice
There are 13 bosses in Salt and Sacrifice, and they will require you to play differently. If you are someone who prefers playing a game without any spoilers, this might be the time to leave as we will go through bosses, which might give you some spoilers. Furthermore, below we have added the perfect strategy for you to use and defeat all the bosses.
Uryks Necklace-Of-Ears

The first Boss out of all the bosses in Salt and Sacrifice is Uryks Necklace-of Ears. He is one of the easy bosses in the game who doesn’t demand many strategies. You can check out the complete breakdown below:
Location
In the Ashbourne Village chapter, you will find the first Boss in this game. Players will find him in the Greymoss Mire sub-area. Go left off the Root-Ceil Vern and go right to finally get to him.
Move Set
- Downward slash: This is a basic slash attack. However, it changes its form to a combo when Urkys health goes below half of its health.
- Leaping attack: The leap attack does the most damage, but you can easily avoid it if you are careful.
- Primary stab: Another basic attack that gets a combo attached to it when Urkys gets low on health.
How to Defeat
Uryks has a low movement speed when it’s attacking, so getting behind him and striking from behind is your best bet at finishing him off. It is where you will get your advantage, and you have to capitalize on it.
During the first phase of the battle, simply go behind him and keep damaging him. However, as his health reaches less than half of his health, you will see him pull off more combos along with his regular attacks. Keeping dodging and going behind him, this time carefully, as he can do massive damage with the combos.
Rewards
- 1x Ashpyr
- 1x Engraved Box
- 1,000 x Salt
- 1x Beloved Idol
- “The Champion” trophy/achievement.
The Green Huntsman

The Green Hunstman is the second Boss of the game, and he is kind of similar to Urkys. He is not the strongest of bosses in the game so taking him on is not that difficult. You can find him in the same chapter, and you can check out the complete breakdown below:
Location:
After you get done with the Mages in Ashbourne Village, go left and open and unlock the Mage-sealed door. It will lead you to the Valesnight Square, where you will find the game’s second Boss.
Move Set
- Axe attack: He will rush in with his Axe to strike you. It does a lot of damage, so watch out for it. He does add a combo to this attack after the first half of his health is gone, so be careful.
- Axe Combo Attack: The same attack as Axe Attack. He does add a combo to this attack after the first half of his health is gone, so be careful.
- Jumping forward Axe Attack: Using his Axe, just like Uryks, he will leap in to deal damage.
- Dash forward: On low health, he will make this attack as a desperate attempt to kill you. Just roll through him to avoid it.
- Bow Attack: If you decide to do this fight from a range, he will not back out from doing you damage using his bow.
How to Beat
Now when you are up against the Green Hunstman, the one thing you must do is dodge and avoid his attacks. Moreover, we would advise you to equip the slightest equipment in your arsenal since being agile against him is essential.
You will not be able to take him on from a distance as he will just use his bow Attack to take you down. So the best way to take him down is by getting up close, dodging his attacks, and doing a good amount of damage every time.
The Green Hunstman will make the Axe attack, Jumping Axe attack, and Bow attack till the first phase of the first passes, and after that, he will add a combo just like Urkys in his attack to make life more difficult for you. You will need to continue dodging his attacks after reaching the second phase and doing what you did first.
Rewards
- Ashpyr x 2
- Incantation Bowl
- Salt x 4,450
- Silver x 700
The Hate-Cursed Matriarch

Salt and Sacrifice is a game where agility matters a lot, and this is another boss where moving fast will help you win. Hate-Cursed Matriarch moves slowly when it attacks, so capitalizing on that is significant in defeating it. Moreover, check out the complete breakdown below:
Location
Keep going left when you are in the Desolate plain of Bol Gerahn, and go beyond the sealed door. Head north till you see the Praying Giants Area from the closed door. Now head up till you see the open ground. You will reach the place where you will get the 4th Boss of the game.
Moves Set
- Strike: A Basic forward strike attack. You can avoid this easily by dodging.
- Leap: Another repeating attack from earlier bosses which you should be used to avoiding by now.
- Smash: She will use her other weapon to smash you to bits. You can easily dodge this again by just rolling.
- Lighting Strikes: Lighting will strike on the floor. It can be challenging to avoid, so rolling through the attack is the best way to do it.
- Lightning Burst: Unlike strikes, this will rain down some small lighting burst on the ground. Notice the area they will come to avoid the attacks.
- Static Shock: The attack is just like what it sounds. You can simply avoid it by moving past her.
How to Beat
Apart from Hate-Curse Matriarch’s regular attacks, when it uses Lightning-based attacks, remember to get behind it to save yourself from damage. You will have to watch out since it will not hesitate to kill you off in one go. Remember to bring some healing items to heal yourself in battle and constantly move. Take your time and defeat as becoming restless won’t help during this boss battle.
Rewards
- Salt x3500
- Silver x415
- Carved Vessel
- Blazepyr
- Goldenpyr
Tireless Exalted

Tireless Exalted has two weapons, one is a censer, and another is a Staff, and he will try to kill you with both. The key to defeating him is understanding each attack’s timing, especially his spirits and wisps. Moreover, you can check out the complete breakdown below:
Location
You will find this Boss in the Bol Gerahn chapter. From Bol Gerahn go east till you get to the Creeping Craves. Now head left inside the cave to get to the Forsaken Gulch and go top left to reach the Boss.
Moves Set
- Censer summons: His main attack is the Censer call, which will summon three spirits that can cause different status effects, so be sure to dodge when they come for you.
- Censer Smash: The Censer Smash covers a large area, so avoid this quickly.
- Staff Smash: Similar to Censer smash but covers a smaller area. Just roll or dodge the attack.
- Staff Pound: Like the smash, the Staff Staffill is pounded on the ground, damaging everyone caught in the radius. You can again avoid this easily by just rolling.
- Staff Summon: When on low health, Tireless Exalted will use the Staff to summon wisps which, if hit, can give you different kinds of status buildup. You should avoid getting hit by these at all costs, as they can kill you instantly.
How to Defeat
There is a pattern to the wisps and spirits which will come out of his attacks. So once you get used to both attacks, it will be easier to avoid and damage them. After you have depleted more than half of his health, he will summon wisps with his Staff; make sure to avoid hitting yourself. These do massive amounts of damage, and you will be good as dead with a couple hitting you.
Rewards
- Silver x415
- Salt x3,500
- Goldenpyr
- Blazepyr
- Carved Vessel
Merga Gredanya

Mega Grendanya is one of the tough bosses in the game due to her summoning ability. Players can become overwhelmed by her ability to summon her small puppets to come to her aid. Moreover, you can check out the complete breakdown below:
Location
You will find the Boss inside the Corvius’ Mire chapter. When you reach Foulmurk Marsh, go east till you find an Obelisk. Just ahead, you will see some poles. Just climb up to go head-on with the next Boss in the game.
Moves Set
- Puppet summoning attack: Small Puppet will get summoned, which will attack you. Moreover, this attack will double the summoning puppets when the Boss is low in health.
- Bomb attack: The Boss will send green skull bombs at you, which will cost you a lot of health if hit, so just dodge them while in the air.
- Melee combo: It is a basic combo she used with her claws, and stStaffPlayers can just roll through to avoid them
- Staff Smash: She will use her staff to smash it. Keep a distance from her to avoid them, and you will be good.
- Invisibility: One of the most dangerous abilities she has, for a short while, she can become invisible. Her shadow is on the ground to track her down and avoid getting hit.
How to Defeat
Make sure you keep rolling and dodging when she uses her Bomb and Puppet summoning attack. The best way to avoid these puppets is to move out of their way and keep dodging until they disappear. When she becomes invisible, make sure you use your ranged attacks at her to keep a distance from her. Dodge, avoid, and attack from range should be your best bet to go against her, as approaching her would result in you getting hit by her melee combo or Staff Smash.
Rewards
- Twin Mosspyr
- Pilgrim’s Urn
- Salt x6,900
- Silver x870
Sapblood Heart

Sapblood is a Boss where timing is critical in your attacks and dodging. There are two stages of the Sapblood Heart, a subtle form before the spirits take control of the Heart and after they take over. You can check out the complete breakdown below:
Location
You can find Sap blood in the chapter Corvius’s Mire, just like Merga Gredanya. To get to her, you will have to first go on a platform just above an Obelisk, where you will find a Treasure Pouch. You will see multiple platforms above each other there. Go right to find a wooden door that will take you to the upper right part of the map. You will see some stairs, go up the stairs, and see the Boss.
Moves Set
- Fog Breath: Sapblood will take a deep breath and release fog that will burst in the direction it goes. Just keep your distance from the fog, and you will be good.
- Fog Burst: This is the same as the breath just acts in a closed range area. Avoiding this attack is easier than Fog Breath. Just maintain a fair distance between you and Sapblood.
- Plunge: This time, her sword will be smashed into the ground. It also adds another variant of slashing once its health is down by half.
- Rush: It will rush towards a side of the arena. Players can just avoid it by simply rolling through the Boss.
- Spirit Shot: Spirits will shoot bullets at you from time to time during the second half of the Boss battle. Remember to watch your back during that time to avoid losing health.
How to Defeat
Sapblood has both ranged and close-range attacks, so you have to be very careful when you attack it. Players should plan to do as much damage as possible before the spirits take over, as it can be tough to damage it. Remember not to attack the spirits as it will not hurt them. Moreover, you should keep dodging and rolling till you see a window of opportunity to strike. Make sure to bring different kinds of equipment and items because this fight can take some time to finish.
Rewards
- Engraved Box
- Salt x 12,270
- Silver x 460
The Two That Remain

This Boss is unlike you everyone you have encountered until now. You will have to take on two bosses at once during this fight. Although they have the health bar shared, they have their own attacks in the game. In this battle, you will be able to dodge their attacks easily as they are both very slow, but the only problem you might face is them attacking simultaneously. Moreover, you can check out the complete guide below:
Location
Just beyond the east of Whitecraf Path, you will find these two inside the Dreadstone Peak chapter.
Ouros, The Living Will’s Move Set:
- Charging Axe: This move has a big hitbox, so make sure you roll forward or backward perfectly when Ouros comes charging.
- Downward Thurst: The bull-like Boss will scream while smashing the ground with its Axe.
- Uppercut: Using his Axe, he will swing the Axe upwards, performing a powerful uppercut which can do a lot of damage if you get caught up in the hitbox.
- Leaping Smash: Just like every other Boss, he will jump in the air and come towards you, trying to smash you to bits
- Runic Explosions: When you are almost done with the Boss using his Axe, he will send some runes which will explode after some time. Remember to avoid them, or your health will side down easy.
Valorous Blade’s Moves Set
- Sword Slam: He will slam his sword and hit you. It takes some time for him to do this, so avoiding thing attacks won’t be a problem.
- Backward Leap: He will Jump backward and strike you with his sword, so remember to watch your back when you roll back behind him.
- Uppercut: Another basic uppercut attack. You can easily avoid it just like you did for all others.
- Kick: This is a simple attack yet very effective, so be aware not to get caught in it.
- Light Projectiles: This attack will only trigger when Valorous Blade is in low health. He will go up in the air and throw a fireball at you. So keep a watch for them during the end of the fight.
How to Defeat
Most of the attacks are easy to avoid in this fight but remember to take your health potions. Remember, they share the health bar, so you cannot kill one-off by making the health bar half. They will also give you a lot of different openings to damage them quickly. So remember to finish them off before they become more aggressive, as this could make life difficult for you in the battle.
Rewards
- Bowl
- Jeweled Fibula
- Salt x24,300
- Silver x1,380
Kraeaxener

What would be an RPG game without a Dragon boss or character inside it? Salt and Sacrifice has its dragon Boss you will have to take on during your way on the Dreadstone Peak chapter. This is the second Boss you will come across in this chapter after The Two That Remain.
Location
Inside Dreadstone Peak, after you defeat both Maerag Grendanya and Sapblood, use the rewards you get from them to teleport to the Pardoner’s Vale. Complete the Stone Circle Rune and return to Dreadstone peak to face him.
Moves Set
- Forst Breath Flyby: He will fly around and breathe frost to the ground. During Kraeaxener’s Frost Breath FLyby, remember to roll and stay behind him to avoid getting inside the way of the attack and the frost on the ground.
- Flying Forst Breath: This is just like the first attack but more powerful. Moreover, when Kraeaxener reaches half its health, it will do the Flying Frost Breath. remember here to stand clear of it, roll back till you are in a safe radius from the dragon as this attack has a big radius
- Frost Breath: It is another attack that includes Frost breathing. However, you will have to get behind the dragon again when it uses Frost Breath. However, be careful as some frost does go behind it as well.
- Claw Combo: It is a primary attack like all bosses have with their weapons. Use the same method as you used with others to avoid this.
- Bite: It is more like a dash forward swipe attack with its face so just roll as soon as you see it.
- Tail Swipe: A basic melee attack involving the dragon’s tail. Just jump or roll through it.
How to Defeat
He has different kinds of attacks ranging from close combat to attacking from a distance, so going against him will not be an easy fight. Moving on to how you should take him out, first is during this Boss, you will have to wait for your window of opportunity to make your mark. When the dragon is in the air and flying above you, increase your health. You can also hit him with your ranged attacks to do damage while being in the air.
Rewards
- Carved Feline
- Frospyr Trio
- Salt x17,400
- Silver x740
Icon Of Pandemonium

From Karaexener, the game will start to test you, giving bosses that are tough to handle. Icon Of Pandemonium is a terrifying-looking monster you will come across in the Elder Copse chapter. If you have made this far in the game, you are already used to the game. So during this Boss, all you have to do is learn its way of attack and understand the pattern. You can check out the complete breakdown below:
Location
Citadel of Sky is where you will find the Icon of Pandemonium. First, when you get past the spinning traps, go through the ether vent to go up. From there, keep going up till you activate the Stone circle. Now retake the Ether Vents to go up till you get to the point where you can grapple. Get to the Obelisk and go up to get to the Boss.
Moves Set
- Thunderbolt Orbs: The Orbs are the toughest to deal with here since they will release tiny lightning threads after they get summoned. Defending against these attacks is the best since dodging them is not possible.
- Homing Lightning: Similar to the other attack involving orbs, this one will be a single orb that will burst into multiple ones and damage you. Just roll through the lightning, and you will be good.
- Lightning Cannon: The little roots of lightning will join together to form a beam. You can roll through easily.
- Lightning Burst: A burst of lighting comes from the Boss covering a reasonable radius. You can just avoid getting close to it during that time not to get caught in the attack.
- Swarming Lightning: Two lightning bolts will come down on you quickly. Either jump or roll through both to avoid them.
- Quick Swipe: It is a basic melee attack you can simply avoid as you do for all other bosses.
How To Defeat
The best way to defeat the Icon of Pandemonium is first to get yourself an armor that does well against Light and Cold. Second, the Boss has a big Hitbox, so make sure you hit him when you can to damage him and get his health low. Moreover, when you are making your attacks remember to back off before it hits you with spells and takes your health down to zero.
Rewards
- Carved Feline
- Ashpyr Trio
- Salt x20,077
- Silver x560
The Worm That Does Not Die
This creepy-looking Worm is as tough as creepy it looks inside the game. This one is the hardest one to defeat among all the bosses you faced till now. Even though it is a demanding boss, you can get through it quickly with the proper strategy execution.
Location
You will find this Boss in the Elder Copse Chapter to reach the Boss’s location. Players must first go beyond Dreadstone Peak, get the rune combination, and head over to the top of the Falling Star.
Move Set
- Flames from hell: You should look out for the start-up animation of this attack, as it can cause a lot of damage if it hits. The Worm will send the flames towards you in a horizontal line. You will have to be very careful when dodging.
- Double Scythe Slash: This is a typical combo with its Scythe. Roll back as soon as you see it coming.
- Leap Attack: Like every Boss, the Worm also has a leaping attack with its weapon. However, it will only use it when it’s in the last half of its health.
- Flaming Geysers: This attack will release flames like a jet from geysers on the ground. These geysers will cast some fireballs. Remember to track where the geysers get created and where the fireballs are landing.
- Meteor Shower: The Worm will summon a black hole, bringing an entire meteor shower towards you. Remember to see where the meteors are landing again and avoid them by rolling.
How to Defeat
It is one of those bosses where the fight will continue to become rigid as time goes by. First, you must avoid Flames from Hell, Meteor Showers,s and Flaming Geysers. After you can predict the moves and easily prevent these attacks, this is where you will be able to now counter-attack.
Now Worm is a very slow-moving character so moving from one side to the other is not a deal. So you can use that to your advantage and make ranged attacks while it tries to catch up. The second way is when you get hit by a Meteor shower, try to get close to the Worm to do massive amounts of damage in one go. Lastly, you should keep armors which are great against fire elements.
Rewards
- Carved Feline
- Blazepyr Trio x 2
- Twin Blazepyr
- Salt x 26,005
- Silver x 150
Inquisitor Amben

There are two secret bosses in the game that you can come across if you are careful enough. One of them is Inquisitor Amben. Both of them are not that tough to defeat. You have to dodge and roll around sufficient to avoid the attacks.
Location
Once you defeat The Worm That Does Not Die, head over to exit the place to get the Essence of Fire. Now, use the roof to get to the Inquisitor Amben. After you talk with it, he will fight you.
Move Set
- Feather Rain: There will be a burst of two feathers which will although feathers but will fall very quickly. You will have to roll towards Amben to avoid getting hit.
- Feather Rain Max: There will be a rain of feathers this time, but the number of feathers that will fall increases. The area of this attack will be significant so getting behind Amben is again the best option.
- Rush In: After making a pose, Amben will rush in to land an attack on you. Players can just roll behind or in front to avoid this.
- Feather Rush: This time, when he rushes in, feathers will fall behind him, so make sure you go opposite to the way that comes at you.
- Slam: Remember to avoid this attack. Although this fast attack is brutal to prevent, make sure you are a distance from him.
- Somersault Slam: Amben will perform a somersault and then hit you.
How to Defeat
It is pretty simple to defeat Amben. All you have to do is avoid his attacks by rolling around. Heal yourself when he makes melee attacks, and lastly, attack when you get the timing of the attacks, and you will be good to go.
Rewards
- Strigid Mask
- Strigid Cloak
- Strigid Sleeves
- Strigid Skirt
- Salt x 27,760
- Silver x 280
Inquisitor Selet

The second secret Boss is Inquisitor Selet in Salt and Sacrifice. Like the other secret Boss, this one is easy to deal beat.
Moves Set
- Double Smash: Selet will bring a barrage of swinging swords at you twice. Just roll throw or get out of the way to avoid this attack.
- Double Strike: This time, he will just strike straight on you. During this attack, he will not change his direction, so making sure you are in the opposite direction when setting up the attack is worth keeping in mind.
- Uppercut Twister: This is a weird attack where he will first attack horizontally with his sword, then spin and go up.
- Leap: This is another leap attack you will have to stand clear off.
How to Defeat
This Boss is aggressive yet slow, so keep in mind to heal up when you are far from him. Also, use your range attacks to punish him hard. Roll through these attacks as mentioned above. Also, ensure you keep enough stamina to do the rolls when trying to avoid his combos, which can be deadly if hit.
Rewards
- Mangian Helm
- Manganian Cuirass
- Manganian Bracers
- Manganian Greaves
- Salt x 20,080
- Silver x 850
The Undone Sacrifice

The final boss, The Undone Sacrifice, without a doubt, is the most brutal Boss you will face in all of Salt and Sacrifice. This Boss will test everything you have learned, fighting bosses, earning skills, and finding treasures and weapons.
Location
In chapter Elder Copse you will find the final Boss of Salt and Sacrifice. When you are on the top of the imperfect Shrine, go to the end of the path to the west to find a Treasure pouch that will have a Cerulean Tome of fates. Now you will have to go back to Runereader Diedala in Pardoner’s Vale to get the final set of Fated Hunts.
After you finish that, return to the center of the area at the top of the Shrine. Look for the tree with a Husk. Now throw your grappling hook at it to trigger the boss fight.
Move set
- Crash Landing: Another leaping attack from yet another boss. You must avoid it by rolling below the Boss to prevent contact.
- Splinter Barrage: Using the Scythe, he will go above ground and shoot splinters from his back towards you. To avoid this attack, just get behind him as soon as you see the animation of making this attack.
- Scythe Combos: This move is tough to avoid due to how fast it occurs. The Undone Sacrifice will rain down its Scythe twice with a downward strike and an uppercut. The best way to prevent this is by using the small window of opportunity between the two combos.
- Whirling Uppercut: A simple spinning uppercut The Undone Sacrifice will perform with its Scythe. You can just roll or dodge pass it to avoid it easily.
- Lightning Scythe: With the help of his Scythe, Undone Sacrifice will spin it to perform a devastating attack that will make small bolts of lightning appear. Each bolt will strike the ground and send a shockwave. During this attack, you will have to move continuously to avoid
- Stomp Combo: It will stay in place for some time and then stomp you twice, doing double the damage if you get caught in the attack. You will have to do a perfect roll underneath the Boss to avoid it.
How to Defeat
The Undone Sacrifice is a boss where timing matters, whether making attacks or avoiding them. Also, remember to take time when you make your attacks. You won’t be able to land many attacks in one go, so stacking up damage is your best friend here.
You should attack only when the Boss goes for the crash landing attack. You avoid this easily; exploiting this weakness is vital to completing the game. Lastly, ranged attacks will do you bits as well when you go against the Undone Sacrifice, as he does not have any attacks which will close the distance between him and you.
Rewards
- Engrave Box
- Silver x 795